Materials you will need:
- Neuroelectrics Device (Enobio / Starstim)
- Wall Plug Charger (black one with grey connector)
- Computer with NIC installed, Location Permissions and WiFi enabled (or WiFi dongle) or USB Isolator
- Measuring tape
- Headcap
- Electrodes
- Kendall / Earclip
- Electrodes Cables
- Electrode Gel / Saline Solution
- Alcohol
- Abrasive paste (Nuprep or similar)
- Cotton Swabs or Gauze Pads
Guidance
Before the day of the visit:
- Fully charge your device with the Wall plug charger. You know it is charging because an orange/yellow led will light up. It will be fully charged when that led turns green.
- Measure the head with the Measuring Tape form the Forehead (1-2 cm above eyebrows) to the Inion. Do not measure the Ears as the headcap has holes for them
- With the Cranial Perimeter measured in Step 2 choose the appropriate Headcap Size from this link: Headcap Size
- Advise the subject to have the hair clean and free of sprays, oils, cream and lotions. Shampoo the hair and rinse with clear water the evening before or the morning of the test.
The day of the visit
- Soak the Electrodes Pellets (internal Ag/Cl) in Gel.
- Dry:
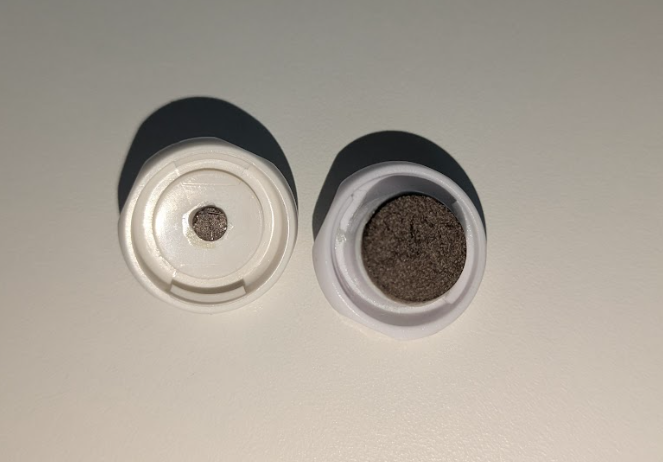
- Soaked:
- Dry:
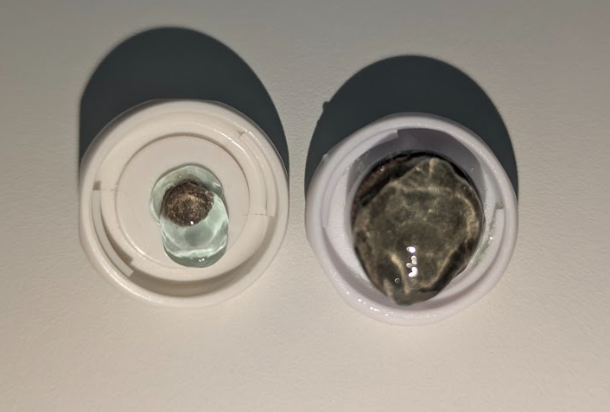
- Insert the Electrodes Rings on the Headcap.
- Rings:
- Ring placed (Outer part of the headcap)
- Ring placed (Inner part of the headcap)
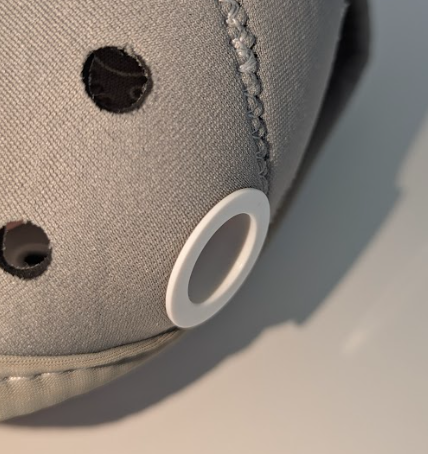
- Ring placed (Outer part of the headcap)
- Rings:
- Place the Headcap on the Head, there shall be no Air Gaps between the Headcap and the scalp. The Headcap shall not be baggy.
- Skin Preparation:
- Clean the skin and scalp thoroughly with alcohol and then apply a small amount of mild abrasive paste (such as Nuprep or similar) to the area of contact with each electrode and with the references.
- Gently rub the paste for several seconds using a cotton swab or gauze pad to reduce surface resistance. Redness is expected.
- Clean the excess paste.
- Clean the Mastoids / Earlobe with the same procedure.
- If you use Kendall (Pre-gelled sticky electrodes): after preparing the skin, place them as close as possible to each other but without touching themselves.
- If you use Earclip: after preparing the skin, put gel on both Pellets an place on the earlobe.
- For every electrode ring on the headcap, apart the hair and put gel inside. Ensure the gel has good contact with the skin. Each ring shalll be filled with gel up to the 80% approx.
- Screw in the upper part of all the Electrodes (the ones previously soaked in Gel).
- Snap the connectors matching the Leads Labels with the Headcap Positions.
- Connect the Electrodes Cables to your device ensuring the connectors are aligned. There will not be any click when connecting the cables with the device.
- Attach your device to the Headcap using the Velcro.
- Turn on the PC
- Turn on your device with the On/Off button. A white light will turn on when the device turns on.
- Open the NIC Software and connect via WiFi or USB Isolator.
- Load the protocol.
Now you are ready for performing an Impedance Check (if you have the latest hardware).
You can continue with your EEG even though you do not have all green colors.
The final verification of the signal is the visual inspection.
Common Problems:
- One channel has high impedances / high variability
- Remove hair in order to ensure that there is contact between the scalp and the gel / Apply more Saline Solution -only if you are using Spontisms-
- Verify that this channel is not disconnected on the Electrodes side
- Verify that the cable sets are not disconnected on the Necbox side
- All channels have high impedances / high variability
- Verify the correct placement of CMS & DRL
- Verify that the cable sets are not disconnected on the Necbox side
Was this article helpful?
That’s Great!
Thank you for your feedback
Sorry! We couldn't be helpful
Thank you for your feedback
Feedback sent
We appreciate your effort and will try to fix the article