While doing an Impedance Check, you might encounter the possibility that there is one or more channels with high impedances that will not allow you to run the Stimulation Protocol.
In this article you will learn, step by step, how to dismiss possible problems in your Starstim, we want to make sure that:
The Internal channels are working properly
The Cables are not damaged
For doing this we will need:
Starstim 20/32
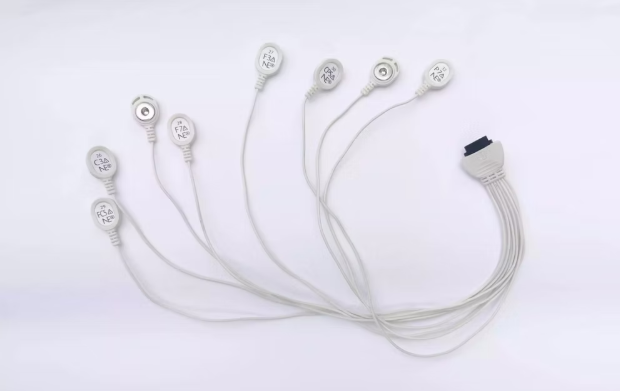
The set of electrodes Cables (NE017)
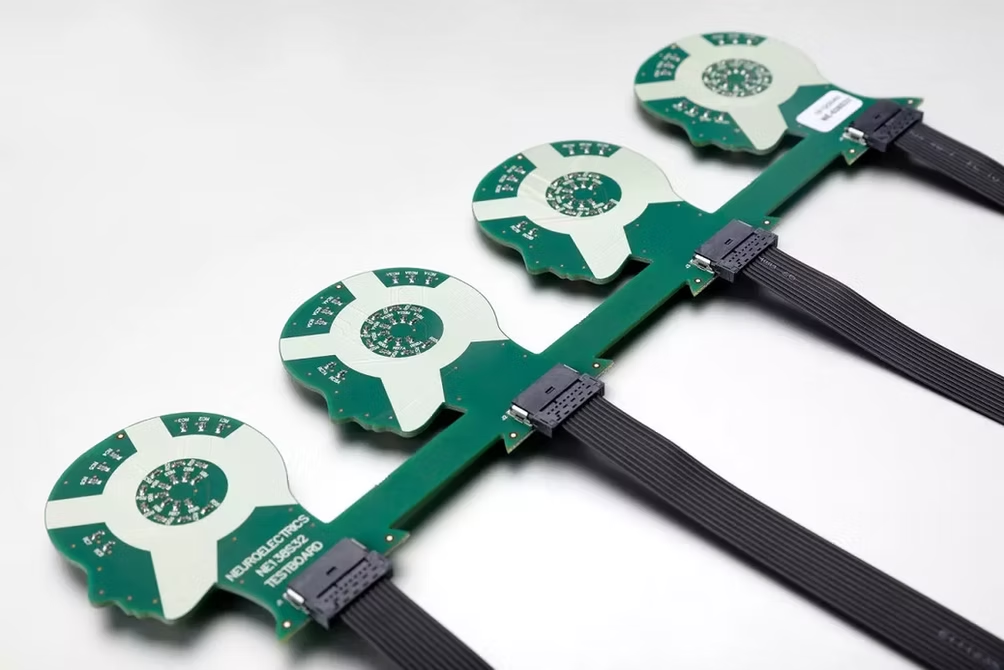
Testboard Head(NE038)
Testboard Cable (NE039) --> Only for devices purchased previous to July 2025
We will name the High Impedance Channels as Ch A and Ch B , where channel A is the stimulation channel and channel B is the return.
Section 1
Please follow the next steps:
Connect the set to the cable slot in the Starstim.
Connect the set of electrodes that contain the channel with high impedance values to the corresponding cable slot.
Connect reference cables.
CMS cable connected to PC3 and DRL to PC4 from the testboard head at the left.
Connect the cables corresponding to Ch A and Ch B to P1C and P2C from your testboard. It does not matter which one goes in P1C and P2C.
Open NIC and connect to your Starstim via USB or WiFi.
Load a Protocol:
Work with the same protocol that you were using when the high impedance was detected.
Remember: The stimulation channels that present high impedances have to correspond to channel A and B.
Run the Impedance Check
If the protocol runs without any high Impedance Message, then the issue is in your set up and isn’t related to the device, please refer to the Article: How to lower high Impedances and do not continue this procedure.
If the impedances are high proceed to section 2.
Section 2
Additional Tests
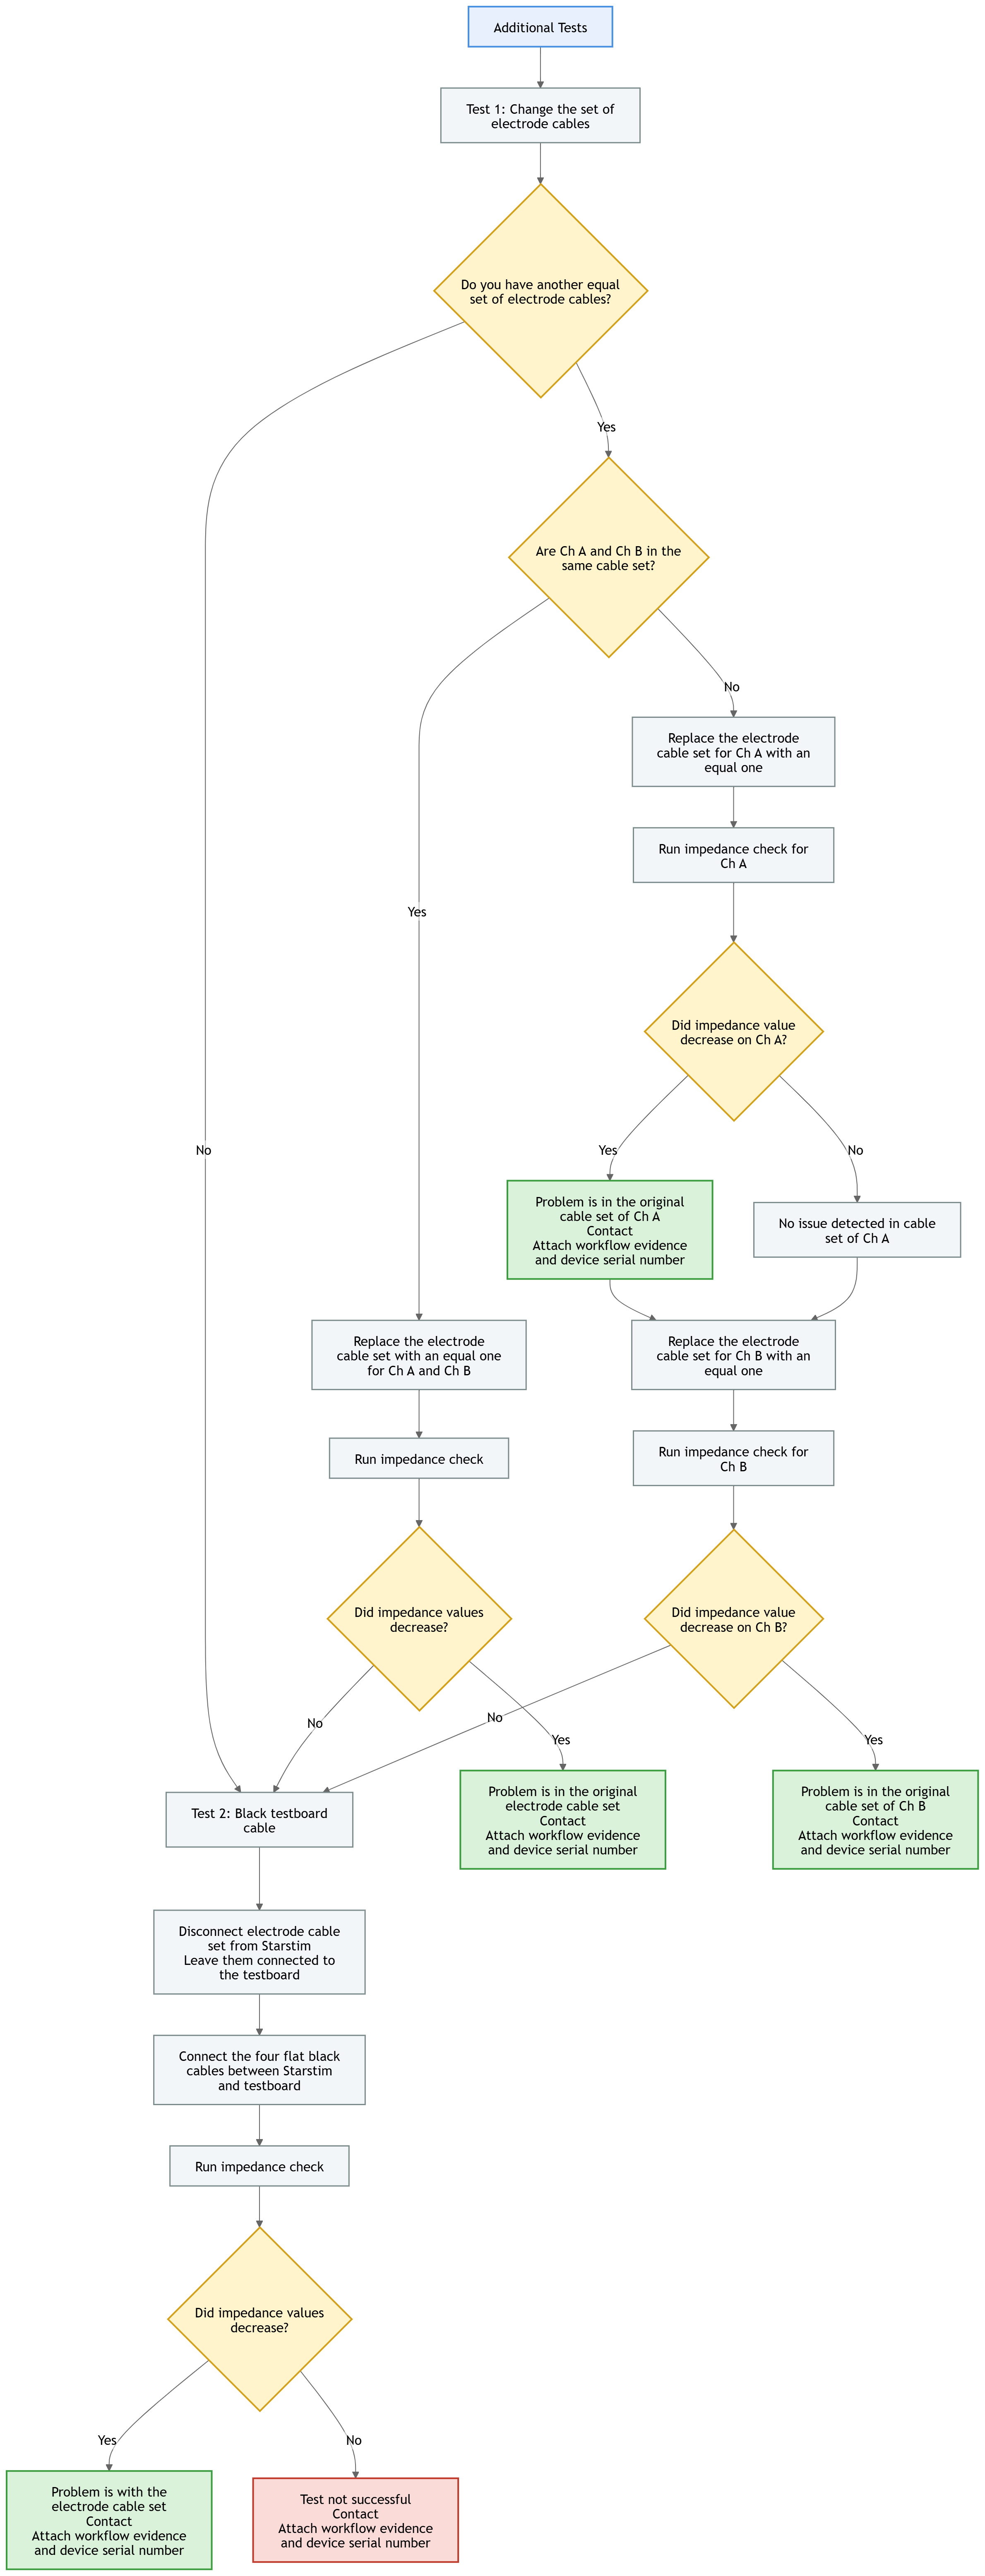
Change the set of electrode cables.
This test can only be performed if you have another set of electrode cables equal at the one used on the previous test. The cable has to be equal but can’t be the same. If you don’t have an extra electrode cable that can be used skip this test and do the additional test ii.
If channel A and B are in the same set of electrode cables, change the set of electrode cables with one equal to the one that you are using, connect Ch A and Ch B, run the impedance check and see if there is any change regarding the high impedances values present on Ch A and Ch B. If the impedance values decrease the problem is in the electrode cable set (the one used before the change).
If channel A and B are from different sets of electrode cables, change the set of electrode cables with one equal to the one that you are using for Ch A, connect Ch A, run the impedance check and see if there is any change regarding the high impedances values present on Ch A. If the impedance values decrease the problem is in the electrode cable set of Ch A (the one used before the change).
Then, If channel A and B are from different sets of electrode cables, change the set of electrode cables with one equal to the one that you are using for Ch B, run the impedance check and see if there is any change regarding the high impedances values present on Ch B. If the impedance values decrease the problem is in the electrode cable set of Ch B (the one used before the change).
If the impedance values decreased to approx 4k in any of this test please contact support@neuroelectrics.com for a quotation or replacement of this product. Attach all the evidence for this workflow and serial number of the device (located at the back of the unit).
If impedances values haven't changed, do the additional test ii.
Black testboard cable.
Disconnect the set of electrode cables from the Starstim device, and from the testboard too. Then, connect the four flat black cables to each cable slot from the Starstim, one end to the testboard and the other connected to the Starstim device. Run the impedance check.
If the impedance values decreased to approx 4k, it means that the problem is with your set of electrode cables. Please contact support@neuroelectrics.com for a quotation or replacement of this product. Attach all the evidence for this workflow and serial number of the device (located at the back of the unit). Refer to → Solution article of repairs / replacements
If the impedances remain high, contact support@neuroelectrics.com Attach all the evidence for this workflow and serial number of the device (located at the back of the unit). Refer to → Solution article of repairs / replacements
Was this article helpful?
That’s Great!
Thank you for your feedback
Sorry! We couldn't be helpful
Thank you for your feedback
Feedback sent
We appreciate your effort and will try to fix the article