This guide will walk you through the steps to improve impedance levels when working with an Enobio system.
The starting point is the skin preparation previous to the application:
1. Clean the skin thoroughly with alcohol and then apply a small amount of mild abrasive paste (such as Nuprep or similar) to the area of contact with each electrode.
2. Gently rub the paste for several seconds using a cotton swab or gauze pad to reduce surface resistance. It is ok that redness appear.
3. Clean the excess paste.
We recommend following the workflow step by step to ensure the best results.
First, you’ll find a visual workflow chart to guide you through the process. Then, each step is explained in detail so you can easily understand what to check and how to optimize your setup.
Workflow:
Step by step guide:
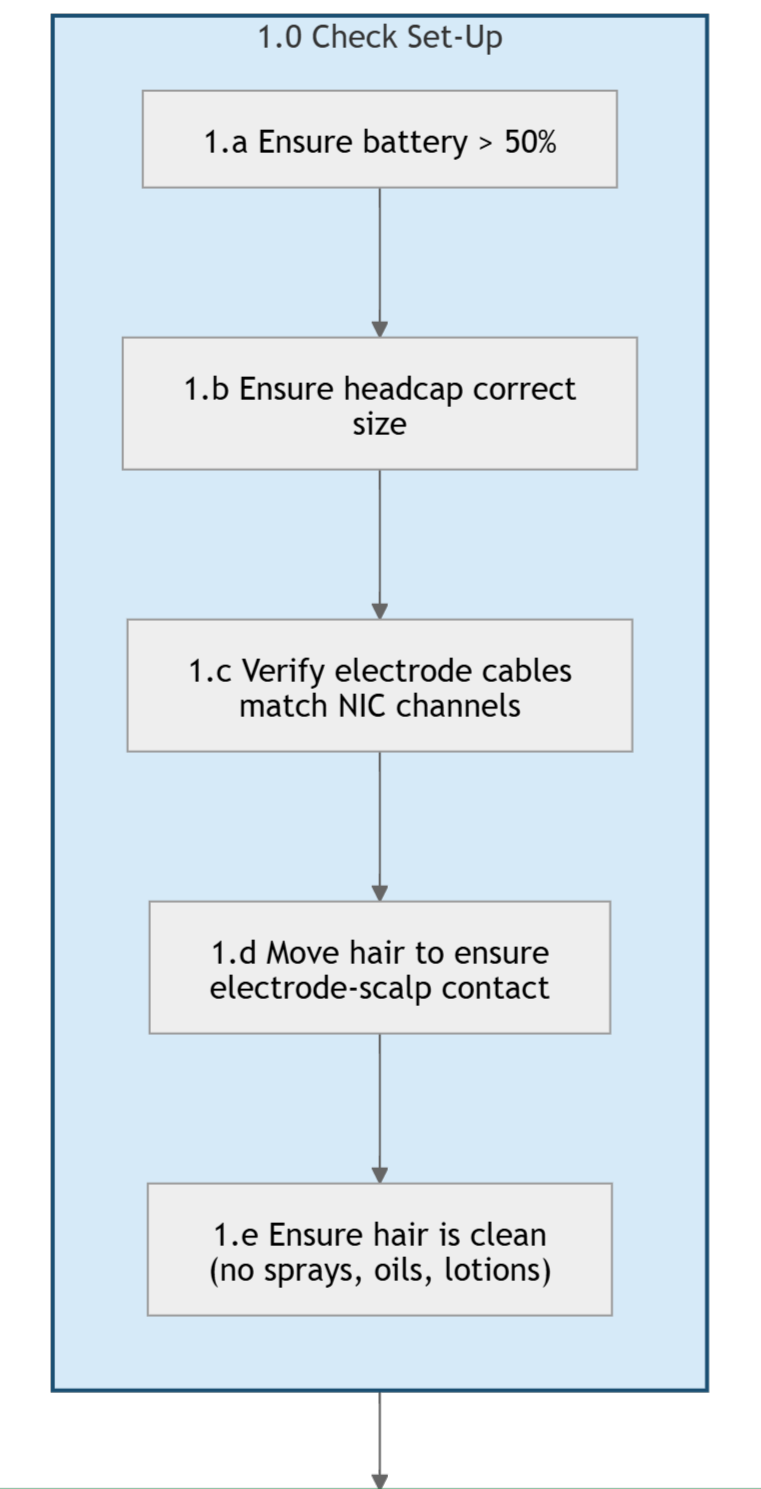
First step: check the set-up
Ensure battery is above 50%
Ensure headcap is the correct size (https://supportne.freshdesk.com/a/solutions/articles/35000298401)
Make sure the electrode cables are connected according to the channels selected in NIC
Move the hair to ensure the contact between the electrode and the scalp
Make sure the hair is clean and free of sprays, oils, cream and lotions. Shampoo the hair and rinse with clear water the evening before or the morning of the test. Avoid hair conditioner or oil;
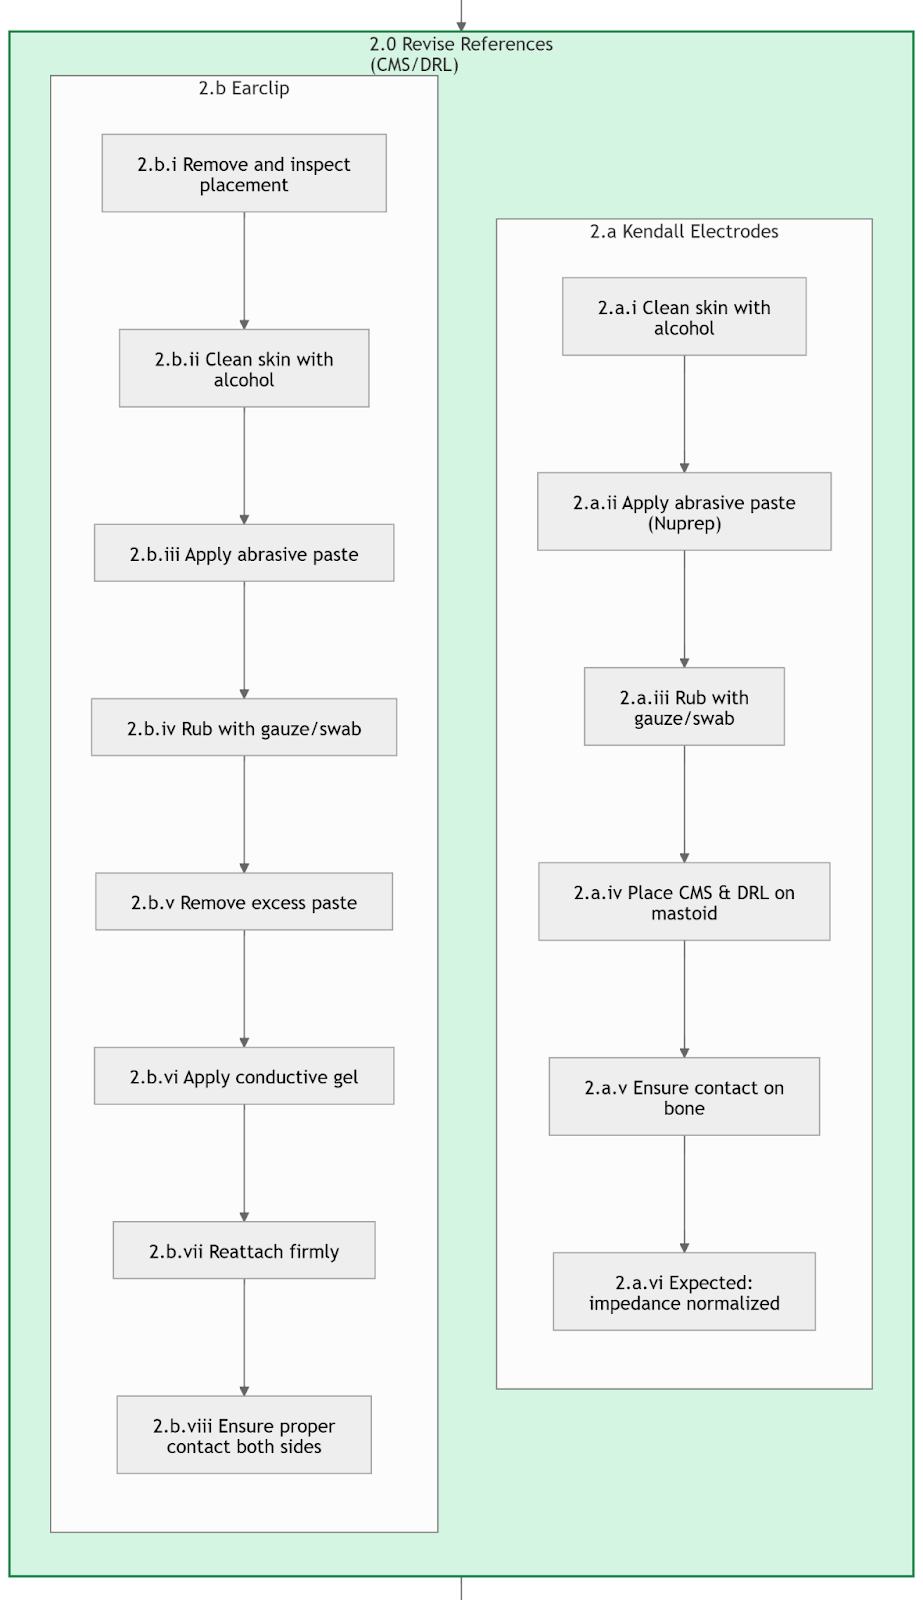
Second Step: Revise the References with the montage that you are currently using
Kendall
Clean the skin with alcohol, and then apply a small amount of mild abrasive paste (such as Nuprep or similar) to gently reduce surface resistance.
Rub the paste for several seconds using a cotton swab or gauze pad to improve electrical contact.
The reference cables (CMS and DRL) will each be connected to a different Kendall electrode. Both electrodes should be placed behind the right ear, on the mastoid area. Please ensure they are properly positioned on the bone, as this will help reduce noise.
Correctly preparing the CMS and DRL electrodes in this way often restores all channels to normal impedance values.
Earclip
Remove the ear clip and inspect the earlobe for proper placement.
Clean the skin thoroughly with alcohol and then apply a small amount of mild abrasive paste (such as Nuprep or similar) to the area of contact on the earlobe.
Gently rub the paste for several seconds using a cotton swab or gauze pad to reduce surface resistance and improve electrical connection.
Wipe off any excess paste, apply a small amount of conductive gel to the ear clip sensor, and reattach it firmly to the prepared site.
Make sure that the clip sits evenly and that both contact surfaces are touching the skin without pinching.
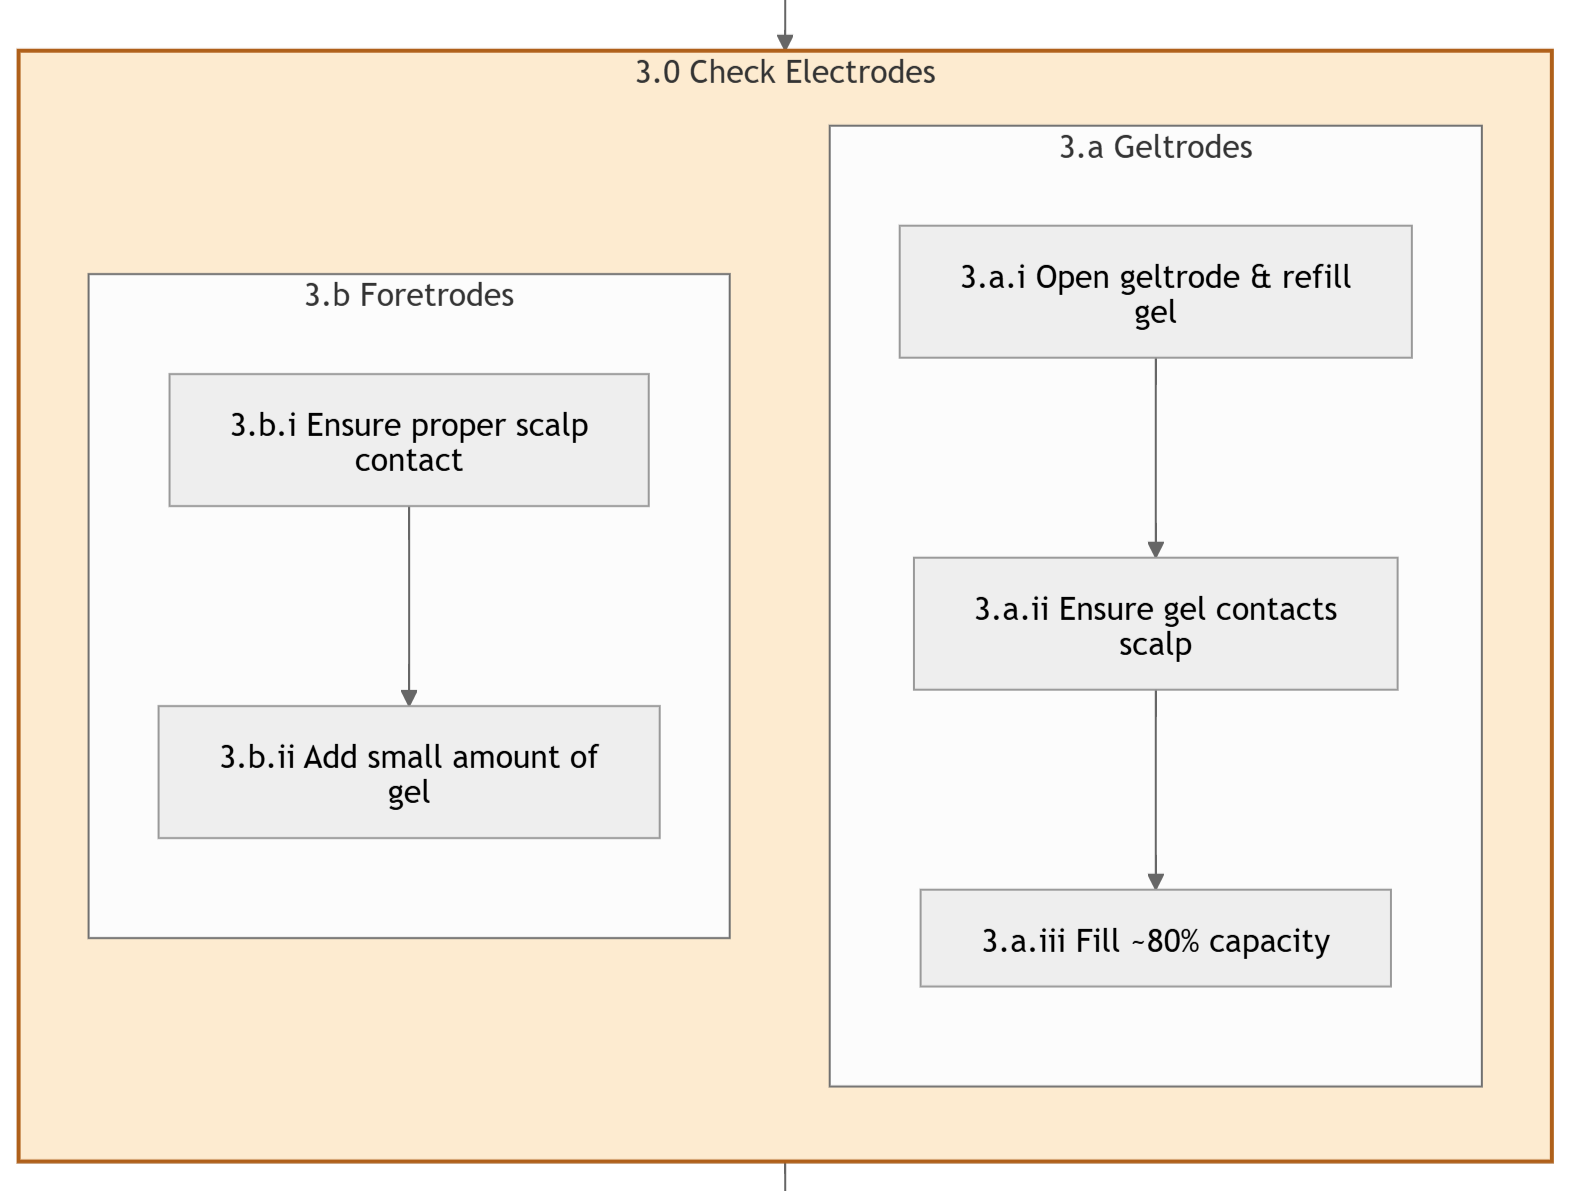
Third step: Check the electrodes
Geltrodes:
Open the geltrode and refill it with conductive gel if needed.
Ensure that the gel is making proper contact with the scalp.
The geltrode should be filled to approximately 80% of its capacity (not completely full, to avoid overflow or bridging).
Foretrodes
Make sure that they are making the proper contact with scalp
Add a small amount of gel to improve connectivity
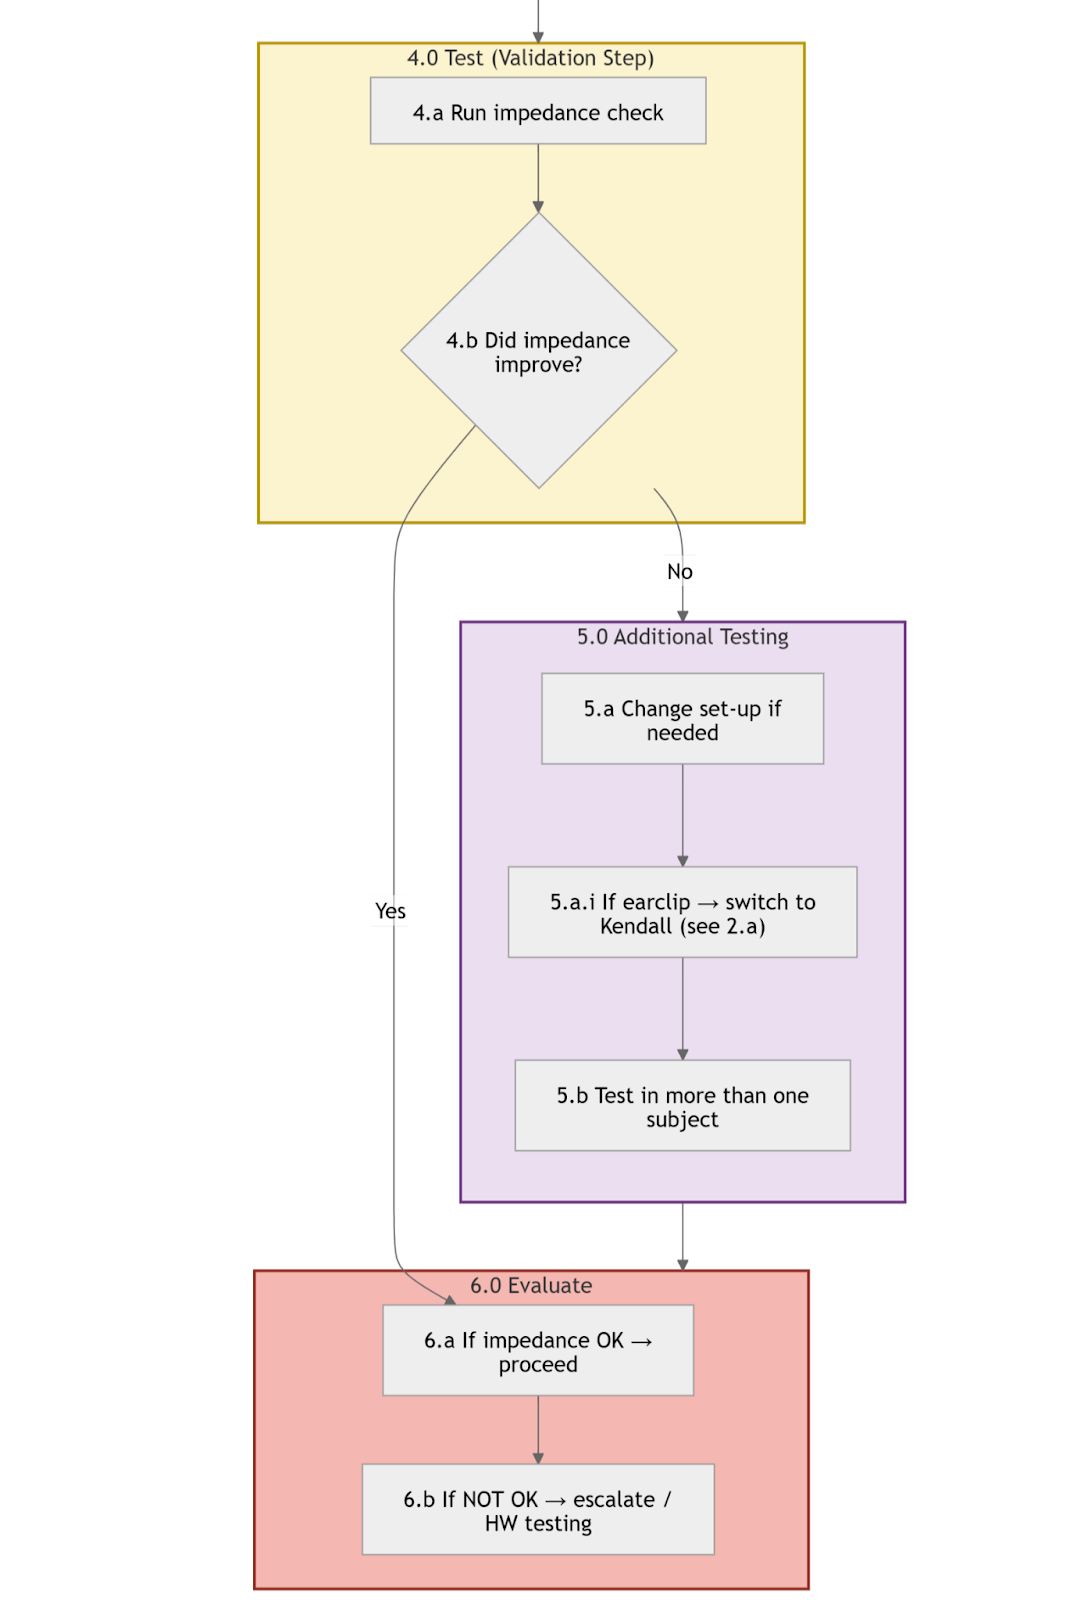
Fourth step: Test
After the three previous steps are done, you can run an impedance check. If the results have improved, and the impedance was satisfactory, you may proceed with your work.
On the other hand, If your results haven’t improved yet or there is not enough improvement some additional tests are required (Step 5).
Additional Steps:
Change the set-up:
If you are using earclip -> change to Kendall (see section 2.a)
If you are working with the earclip, it might be adding some artifacts to the signal, therefore switching to kendalls could be an option.
If possible, test in more than one subject
Perform the same test (running the impedance check) on a different subject to determine if the results vary.
Evaluate:
After these two additional tests are done, if the results have improved, and the impedance was satisfactory, you may proceed with your work.
On the other hand, if the results have not improved or the improvement is not sufficient, we kindly ask you to contact us at support@neuroelectrics.com.
In this case, please share all the details regarding the tests you have already performed, along with any supporting evidence (e.g., screenshots, recordings, or logs). This information is extremely valuable for our team to accurately identify the potential root cause and ensure a smooth and efficient repair process, if needed.
Was this article helpful?
That’s Great!
Thank you for your feedback
Sorry! We couldn't be helpful
Thank you for your feedback
Feedback sent
We appreciate your effort and will try to fix the article